Sidewalls are what turn a pop-up canopy from a sun cover into an enclosed booth, and the decision is easier once you break it into four parts: how many linear feet of wall your footprint actually needs, which wall styles match the way you use the tent, what fabric and certifications to specify, and how the walls attach so they fit the frame you already own. Get those four right and the walls seal cleanly, print sharp, and last as long as the top.
Start with how much wall your footprint needs
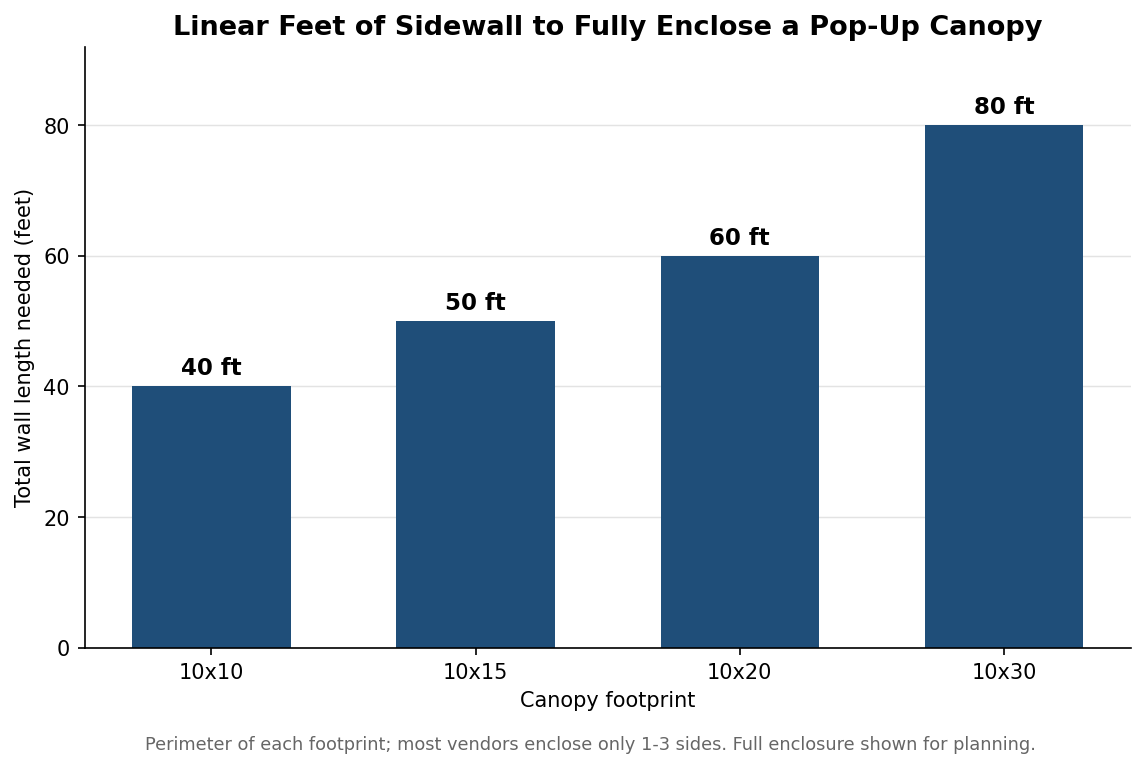
Walls are priced and sized to span one bay, leg to leg, so the first number to nail down is your perimeter. A 10×10 canopy has a 40-foot perimeter, which is four 10-foot panels if you enclose all four sides. Step up to a 10×15 and the two long sides each take a 15-foot panel while the two ends stay at 10 feet, for 50 linear feet. A 10×20 comes to 60 feet — two 20-foot side panels and two 10-foot end panels — and a 10×30 reaches 80 feet. Most vendors never enclose all four sides: a common setup is a solid back wall, one or two side walls, and an open front facing customers, so you may only be buying two or three panels rather than the full perimeter.
Match each panel to its exact bay. Custom walls are commonly offered in 5, 6.5, 10, 13, 15, 17, and 20-foot widths so a single panel covers a single side. Buying one panel per bay beats trying to overlap two short walls across a long side, which leaves a vertical seam that gaps in wind and complicates any printed graphic that has to read across the whole face.
Match the wall style to the job
Closed (full) walls are solid polyester that runs from the roofline to the ground, giving full weather protection and privacy. They suit trade shows, overnight storage, and any setup where you want to close the booth completely. Window walls replace part of that solid panel with clear PVC so daylight comes in and passersby can see product — the right call for retail pop-ups, craft fairs, and exhibition stands. Half or counter walls stop at roughly counter height and keep the top of the booth open, which is what food vendors and information booths want when interaction and airflow matter more than enclosure; they pair naturally with a sidebar or counter. Mesh walls trade the weather seal for airflow and insect protection, a good fit for hot climates and food service where a solid wall would turn the booth into an oven. Roll-up door walls add a zippered doorway with roll-up straps so you can control entry without swapping the whole panel.
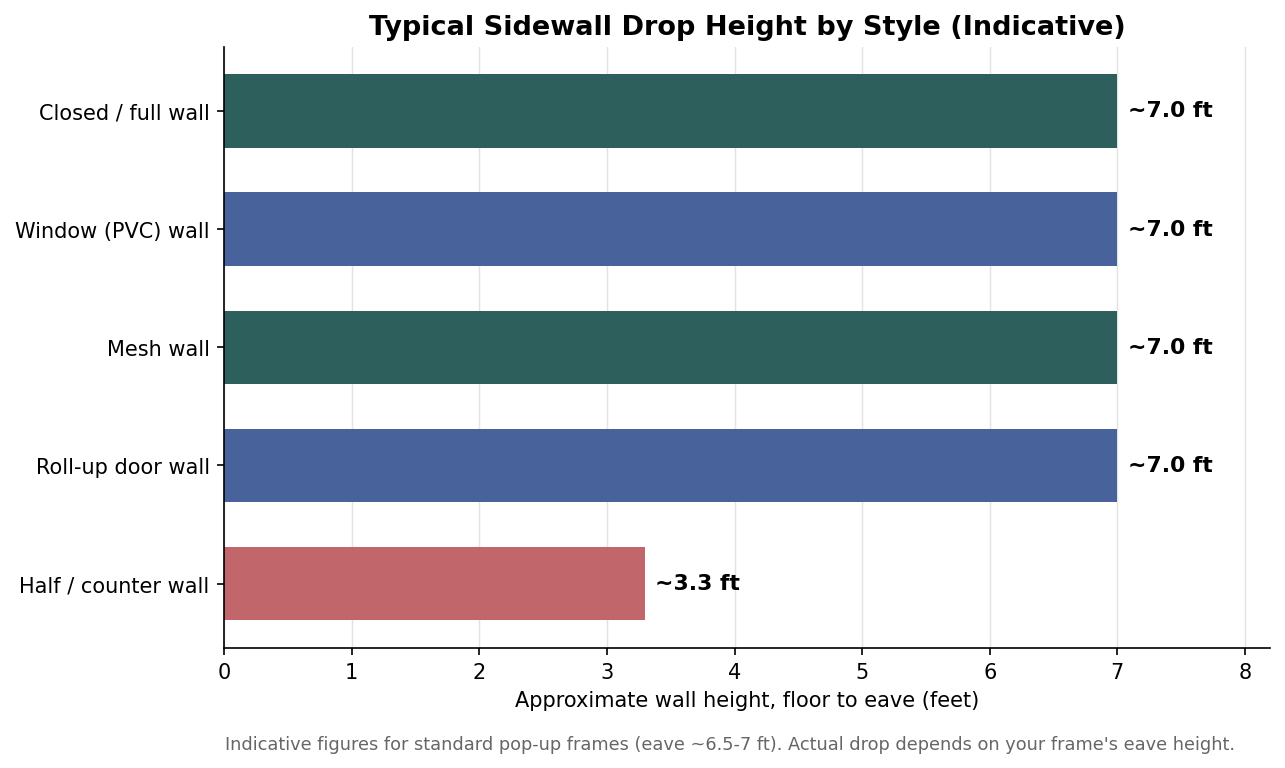
Height is the practical difference between these styles. Full, window, mesh, and door walls hang roughly 6.5 to 7 feet to reach the ground from the eave of a standard pop-up frame, while half walls sit around 3 to 3.5 feet. Those figures are indicative — the real drop depends on your frame’s eave height, which is exactly why fit is the part buyers most often get wrong.
Specify the fabric, coating, and fire certificate
Sidewalls are usually cut from the same class of polyester as the canopy top, commonly in the 500 to 600 denier range, with a polyurethane coating for water resistance and a UV finish so the color holds outdoors. The specification that catches people out is flame retardancy: many venues, and most indoor convention centers, require a flame certificate such as NFPA 701 or CPAI-84 before they will let a tent onto the floor. Ask for that certificate in writing when you order, because a wall that is not certified can get a booth shut down even if the canopy top is. It is also worth matching the wall fabric weight and finish to the top so the two pieces weather at the same rate and the color reads as one unit rather than two slightly different whites.
Get the attachment and fit right
Most custom walls attach with hook-and-loop (Velcro) sewn along the roofline valance, then a vertical strip of hook-and-loop up each corner leg that seals the seam between neighboring panels. Door walls add a zipper, and the bottom edge is held down with ground grommets and stakes on grass or simply weighted against the frame on hard surfaces. The reason fit matters so much is that a wall built for a different frame’s eave height or leg spacing will either gap at the top, where wind gets under it, or puddle at the bottom, where it drags and frays. When you order custom walls, give the shop your exact frame — brand, eave height, and leg-to-leg spacing — rather than just the nominal 10×10 size, because two 10×10 canopies from different makers do not always share the same eave height.
Print method, lead time, and budget
For full-color graphics, dye-sublimation prints the design into the same fabric used for the wall, so the color runs edge to edge and does not crack or peel the way a surface-applied vinyl can. Single-color or blank walls cost less because they skip the printing step entirely. Custom-printed walls generally take a couple of weeks to produce after you approve the artwork, though that window stretches in peak event season; treat any turnaround you are quoted as the shop’s own, not a universal rule. On budget, blank sidewalls are the cheapest way to add function to a canopy you already own, while full-color dye-sublimated walls cost more per panel and more still as you add windows, doors, and multiple printed faces. Those are indicative market patterns rather than firm quotes — the only number that counts is the one your printer gives you for your exact fabric, size, and print coverage.
Sidewalls are the highest-value accessory you can add to a pop-up canopy, and the order goes wrong far more often on fit and certification than on style. Work out your perimeter, pick the styles that match how you actually run the booth, specify certified flame-retardant fabric, and hand over your real frame dimensions, and the walls will do their job for as many seasons as the tent does.